
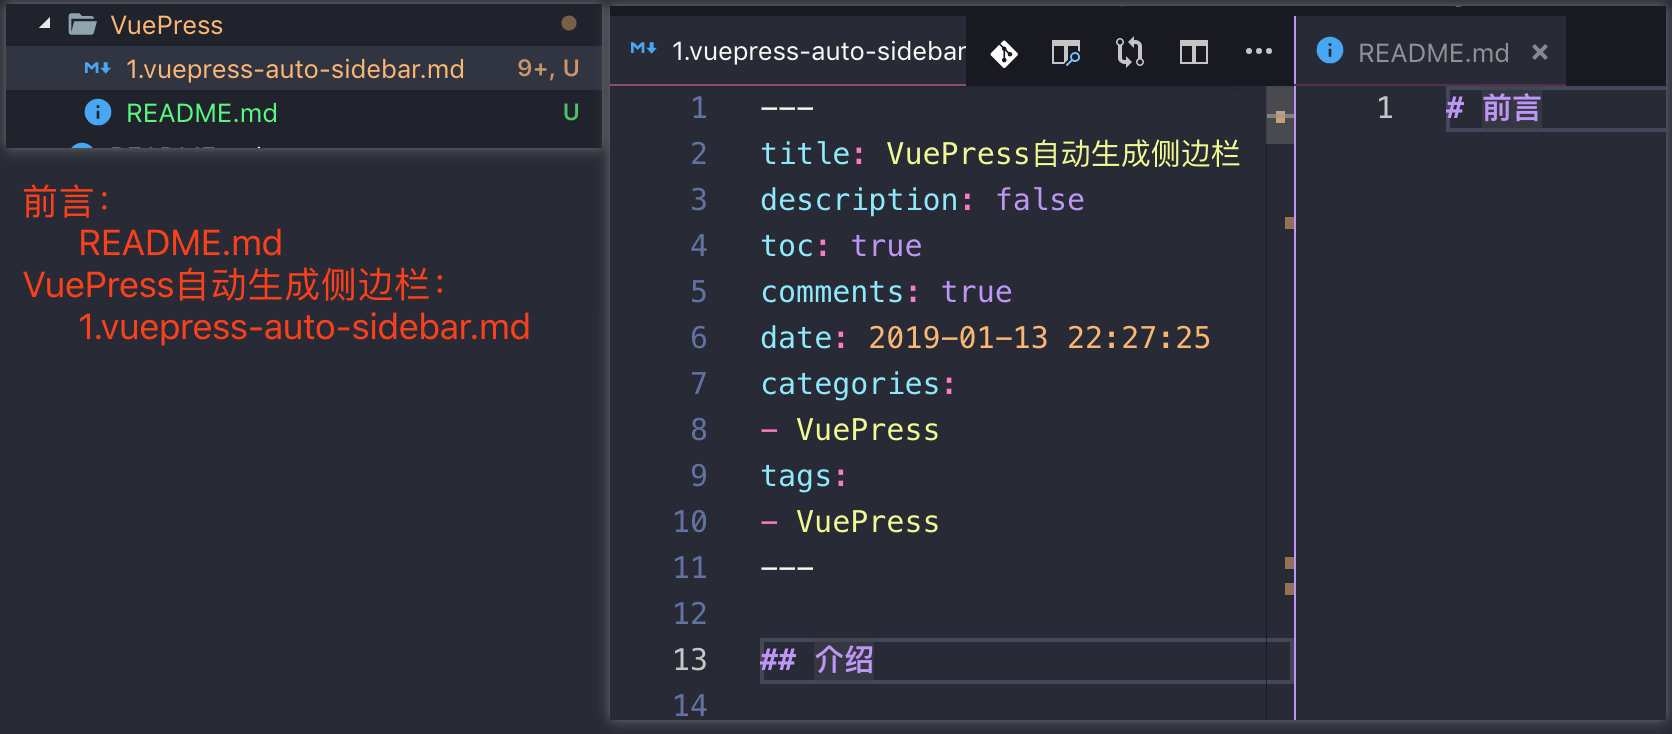
 VuePress自动生成侧边栏
# 介绍
VuePress是vue作者的又一力作,主要是为文档写作而生。
vuepress 1.0 官网 (opens new window)
详细内容可参考官网
当你打开本文时,说明已经了解了什么侧边栏。所以,本文主要分享下如何用脚本自动生成侧边栏。
这里首先感谢 飞跃高山与大洋的鱼 (opens new window)
本人也是根据这位UP主的视频来一步步实现的。
B站视频地址 【啰里啰嗦】一步步搭建 VuePress 及优化 (opens new window)
# 开始
首先,如果要自动生成侧边栏,就必须先生成侧边栏的文件列表,也就是目录,vuepress的侧边栏是可以配置好几种方式。
这里达到的效果是能根据文件夹内的内容自动生成左侧侧边栏。
# 1. getFilenames.js
先获取目录下的所有文件名
getFilenames.js
/**
 * 获取一个目录下的所有文件名
 * 使用方法:var filehelper = require('./getFilenames.js')
 * filehelper.getFileName("/Users/fangzheng/JavaDev/blog/docs/BigData/Flume/")
 */

const fs = require('fs');
// 排除检查的文件
var excludes = ['.DS_Store']

var filehelper = {
    getFileName:function(rpath) {
        let filenames = [];
        fs.readdirSync(rpath).forEach(file => {
            if (excludes.indexOf(file) < 0 ) {
                fullpath = rpath+"/"+file
                var fileinfo = fs.statSync(fullpath)
                if(fileinfo.isFile()){
                    if (file === 'README.md') {
                        file = '';
                    } else {
                        file = file.replace('.md', '');
                    }
                    filenames.push(file);
                }
            }
        })
        // console.log(filenames)
        filenames.sort(); // 排序
        return filenames;
    }
}
module.exports = filehelper;
2
3
4
5
6
7
8
9
10
11
12
13
14
15
16
17
18
19
20
21
22
23
24
25
26
27
28
29
30
31
32
33
该文件向外暴露了一个filehelper对象,引入该文件getFilenames.js,然后使用getFileName函数即可
const filehelper = require('/utils/getFilenames.js');
filehelper.getFileName("/Java/Basic/"); // 获取目录下所有文件名[数组形式]
2
我们想配置的效果就是侧边栏分组 (opens new window)的形式
所以,需要把获取到的filenames给转换成一个对象
// .vuepress/config.js
module.exports = {
  themeConfig: {
    sidebar: [
      {
        title: 'Group 1',   // 必要的
        path: '/foo/',      // 可选的, 应该是一个绝对路径
        collapsable: false, // 可选的, 默认值是 true,
        sidebarDepth: 1,    // 可选的, 默认值是 1
        children: [
          '/'
        ]
      },
      {
        title: 'Group 2',
        children: [ /* ... */ ]
      }
    ]
  }
}
2
3
4
5
6
7
8
9
10
11
12
13
14
15
16
17
18
19
20
也就是上面代码中高亮5-13行的部分。
# 2. index.js
index.js文件主要是为了将传递的一些参数,转换成vuepress可接收的一个对象格式
index.js
const utils = {
  genSidebar: function (title, children = [''], collapsable = true, sidebarDepth = 2) {
    var arr = new Array();
    arr.push({
      title,
      collapsable,
      sidebarDepth,
      children
    })
    return arr;
  }
};

module.exports = utils;
2
3
4
5
6
7
8
9
10
11
12
13
14
# 3. sidebarConf.js
通过以上的代码,其实可以实现自动生成vuepress可接收的对象了,但是还不够,我们需要自动的效果。显然上面的代码还是不能根据我们docs目录下的文件,自动生成侧边栏。
sidebarConf.js文件主要是配置整个博客站点的所有侧边栏(只需配置目录就行)
const path = require("path")
const rootpath = path.dirname(__dirname) //执行一次dirname将目录定位到docs的上级目录,也就是博客根目录
const docs = rootpath+"/docs/"
const utils = require(rootpath+'/utils/index.js');
const filehelper = require(rootpath+'/utils/getFilenames.js');

/**
 * 侧边栏的配置(顺序无所谓)
 * utils.genSidebar('Java基础', filehelper.getFileName(docs+"/Java/Basic/"), false),
 */
 module.exports = {

     // .... 省略部分

     // 其他
     '/Other/BlockChain/': utils.genSidebar('区块链', filehelper.getFileName(docs + "/Other/BlockChain/"), false),
     '/Other/Finance/': utils.genSidebar('金融', filehelper.getFileName(docs + "/Other/Finance/"), false),
     '/Other/Git/': utils.genSidebar('Git', filehelper.getFileName(docs + "/Other/Git/"), false),
     '/Other/Hexo/': utils.genSidebar('Hexo', filehelper.getFileName(docs + "/Other/Hexo/"), false),
     '/Other/Vue/': utils.genSidebar('Vue', filehelper.getFileName(docs + "/Other/Vue/"), false),
     '/Other/VuePress/': utils.genSidebar('VuePress', filehelper.getFileName(docs + "/Other/VuePress/"), false),

     // 关于我
     '/About/': utils.genSidebar('关于我', filehelper.getFileName(docs + "/About/"), false),

     // 一定要放在最后!!!
     // 根目录下的 sidebar, 对于所有未匹配到的都会应用该 sidebar
     // '/': [''] // 此处选择禁用
 };
2
3
4
5
6
7
8
9
10
11
12
13
14
15
16
17
18
19
20
21
22
23
24
25
26
27
28
29
30
通过以上的代码,基本已经可以实现侧边栏自动生成了。
代码目录结构如下:
├── blog
│   ├── config
│   │   ├── navConf.js
│   │   ├── sidebarConf.js
│   ├── docs
│   │   ├── Other
│   │   │   ├── BlockChain
│   │   │   │   ├── Creating-a-blockchain-with-Javascript.md
│   │   │   │   └── README.md
│   │   │   ├── Finance
│   │   │   │   ├── README.md
│   │   │   │   └── china_financial.md
│   │   │   ├── Git
│   │   │   │   ├── README.md
│   │   │   │   └── git-keys.md
│   │   │   ├── Hexo
│   │   │   │   ├── README.md
│   │   │   │   └── hexo-sync.md
│   │   │   ├── README.md
│   │   │   ├── Vue
│   │   │   │   ├── 1.vue-element-ui.md
│   │   │   │   └── README.md
│   │   │   └── VuePress
│   │   │       ├── 1.vuepress-auto-sidebar.md
│   │   │       └── README.md
│   ├── utils
│   │   ├── getFilenames.js
│   │   ├── index.js
2
3
4
5
6
7
8
9
10
11
12
13
14
15
16
17
18
19
20
21
22
23
24
25
26
27
28
# 效果
一个文件夹对应一个导航菜单
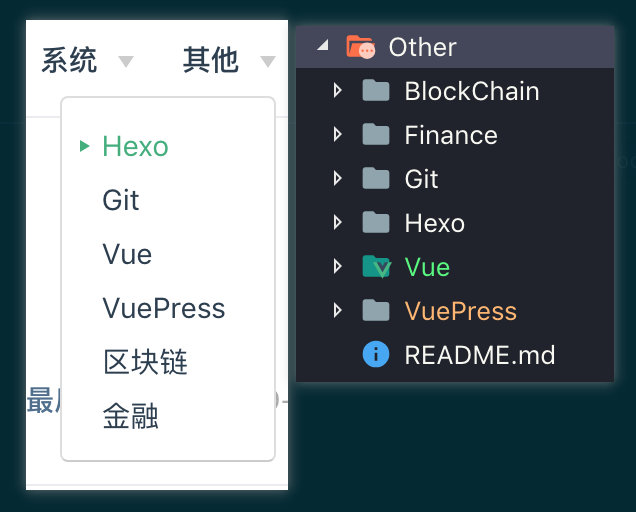
而点击某个菜单(例如:点击VuePress)之后,左侧的侧边栏会先自动生成docs/Other/VuePress/下的所有.md文件
将所有的.md文件生成为一个子菜单。
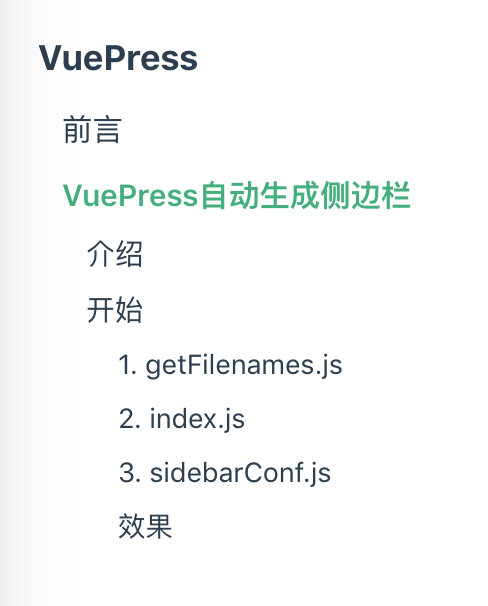
而点击子菜单(VuePress自动生成侧边栏)后,可以看到该.md文件的内容也会自动生成侧边栏(取决于你配置的侧边栏深度),我这里是把markdown的2、2级标题渲染成侧边栏菜单了。
提示
值得一提的是,侧边栏已经排序了,也就是说你可以在相应的文件夹下建立markdown文件的时候,可以加上序号。这样生成的左侧菜单链接也是有序的.
例如:
docs/vue/
1.vue介绍.md
2.vue基础使用.md
3.vue组件.md
2
3
4
这样的话,左侧侧边栏就会生成下面这样顺序的子菜单,而点击每个子菜单(vue介绍)后,就会根据vue介绍.md文件里的标题字段生成左侧菜单链接。
vue介绍
vue基础使用
vue组件
2
3
# 总结
通过以上方式处理完侧边栏后,以后只需要在相应的文件夹下写markdown文件即可,不用关心菜单的生成,也不用手动配置侧边栏。
注意
1、如果新增菜单(jquery)的话:需要在navConf.js中新增菜单(jquery),在sidebarConf.js中配置路由(jquery)即可。
2、每个文件夹下必须有个README.md文件,这是vuepress的约定!
剩下的,就直接在(jquery)文件夹下写markdown文件就行啦。。。
到这里,自动生成侧边栏就已经说完了。有问题可留言讨论。。